Handcrafted Tabletop Terrain
Initial Design
3D Printed Elements
Initial Design
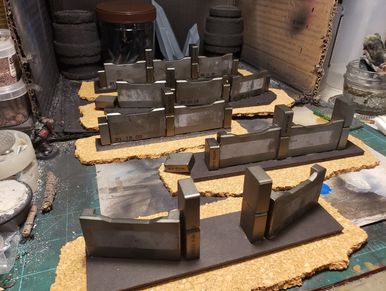
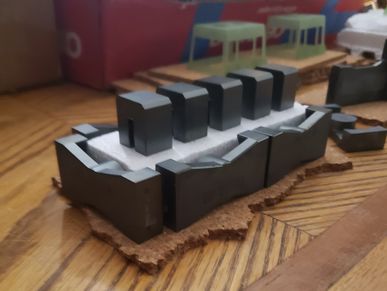
These metal pieces were salvaged out of Toyota Rav4 DC/DC convertor.
They were used to design the wall sections found in the shop.
After Casting
3D Printed Elements
Initial Design
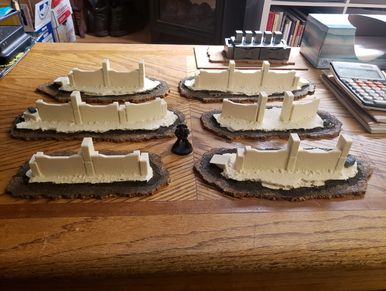
After basing, molds were made of the walls, and once cast the wall sections are based again. Very durable design.
3D Printed Elements
3D Printed Elements
3D Printed Elements
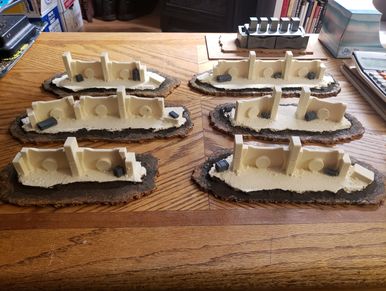
3D printed elements are added at this stage, before priming.
There are many 3D printable options for creating the right setting for your battles.
Scratch Building
Scratch Building
3D Printed Elements
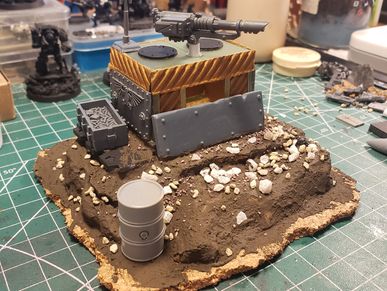
Not all the terrain built here in the shop is practical to mold and cast. In this case an Imperial bunker was scratch built, adding 3D printed parts and genuine GW bits.
Creative Process
Scratch Building
Creative Process
More of the Toyota pieces.
The concept here is a futuristic power generator, which will have 3D printed pipes and wires to make it indistinguishable.
Work in Progress
Scratch Building
Creative Process
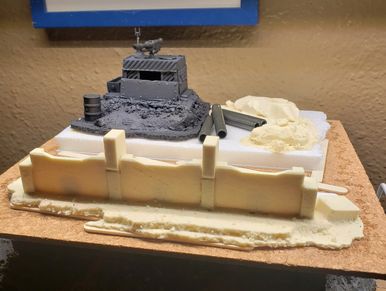
Gaming boards and sectional or modular systems are gaining in popularity.
This 12x12 integrates a bunker with one of the large wall sections.
What should I look for in Terrain?
- The terrain made here at the 40-Hammer Chop-Shop is made to a high standard using high quality materials, and painted using a combination of airbrush and hand painted techniques to achieve a realistic look. Much of my work is still inspired by the look and feel of classic Warhammer 40,000 settings as I started in the hobby in 1994. Much of my painting style is rooted in 2nd Edition, while using modern techniques to achieve a certain updated classic aesthetic.
- Much of the terrain here is very similar to the old Terraform resin terrain available back in 1990's. These terrain pieces have a nice weight to them. Won't easily be knocked around on the tabletop, and are quite durable in the event they are accidentally knocked off the table.
- Mounted on high quality cork mat, these set down softly, have a really nice feel, and wont scratch fine surfaces.
- Each piece is finished with tufts of grass and a coat of varnish. In many cases 3D printed elements have been added for realistic battlefield effect.
- Available in standard themes, however, the possibilities are only limited by your imagination!
- Get in touch for a quote if you have an idea you want to see come to life.
- The ice crystal terrain you see featured here was the brain child of one of my clients. I was given artistic license to create his vision, and an amazing set of winter themed places of power were created for his Age of Sigmar table.

Terrain Design Process
Sculpting
Preparation
Preparation

Terrain can be made out of many materials we often throw away or are hard to recycle. The first step is designing the raw materials into natural looking features.
Preparation
Preparation
Preparation
Texture can be added before the chosen pieces are contained in preparation to pouring the silicone. Hot glue is typically used to seal the walls to prevent leaks.
Mold Making
Preparation
Mold Making
Pouring the silicone to cover the models requires some calculations for volume. I use Smooth-On high quality silicone to make the molds which can be used over and over.
Casting
From Foam to Resin
Mold Making
Volume calculations are made for the Smooth-On resin and as you can see here the chemical reaction that transforms from liquid to solid in minutes.
From Foam to Resin
From Foam to Resin
From Foam to Resin
Once cured the pieces are removed from the molds, washed and dried, before basing on high quality cork bases so they wont scratch finely finished surfaces.
Based and Painted
From Foam to Resin
From Foam to Resin
Basing materials are added and painted to match your miniatures basing scheme, or gaming mat. A combination of airbrush and hand painting techniques are used to achieve a realistic finish.